Hallo und herzlich Willkommen auf der Demo Page von Responsive Simple.
Hier findest du Tutorials und Anleitungen, wie du dieses responsive Template ganz deinen Wünschen entsprechend gestalten kannst und es nach deinem Geschmack personalisieren kannst.
Im folgenden die einzelnen Schritte einfach erklärt.
Hello and Welcome on this Demo Page of Responsive Simple.
Here you can find all kinds of Tutorials and Instructions on how to set up this responsive Template just like you want to.
Here you can find each step explained.
Installing Simple Responsive
Unknown |
Mittwoch, 7. August 2013
|
Write A Comment
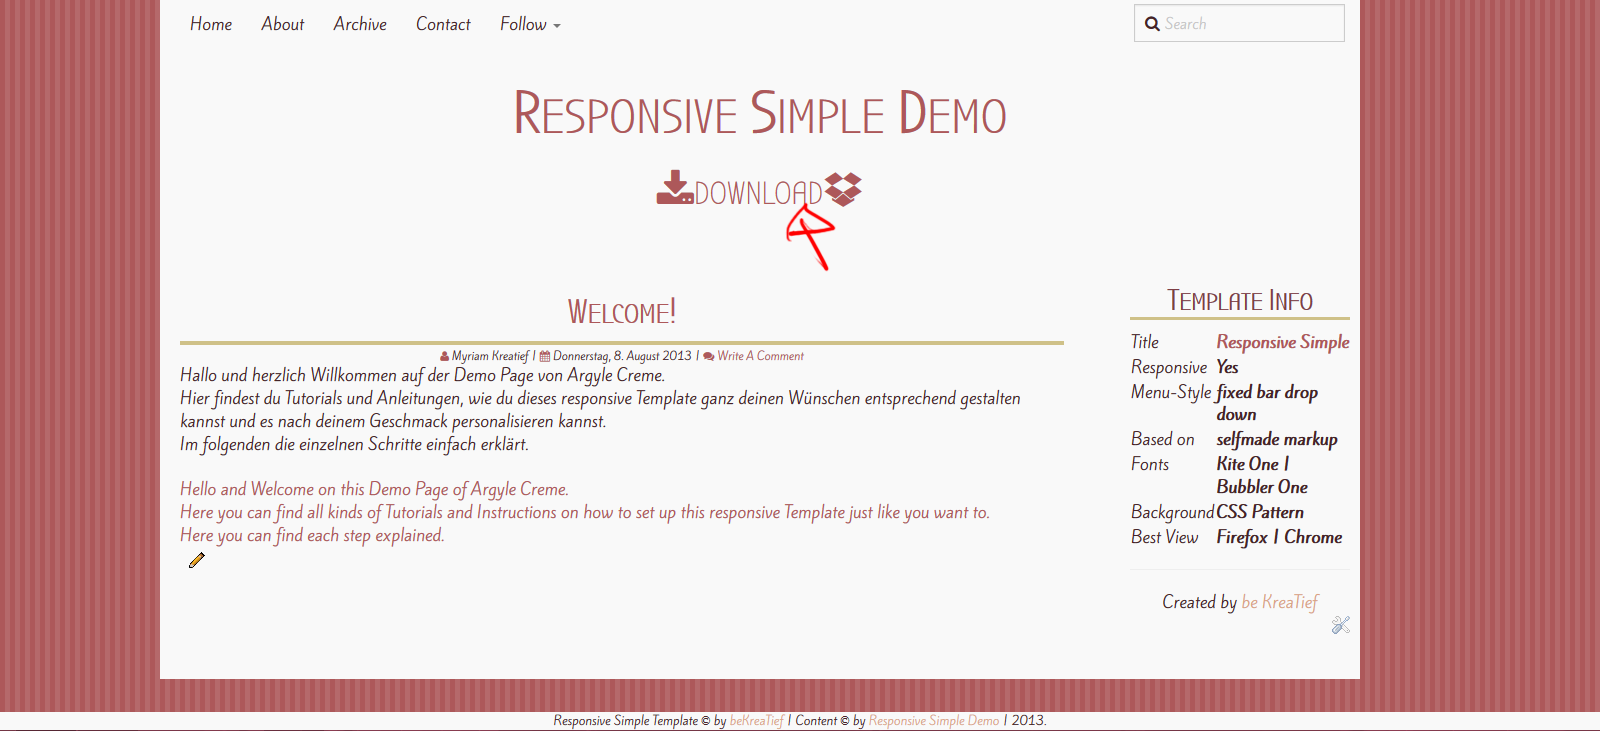
Responsive Simple ist schnell installiert. Als erstes drückt ihr im Demo auf den Download-Link und speichert den Ordner auf eurem Computer ab.
Responsive Simple is installed very fast. First click on the download link and save the zip-archive to your computer.
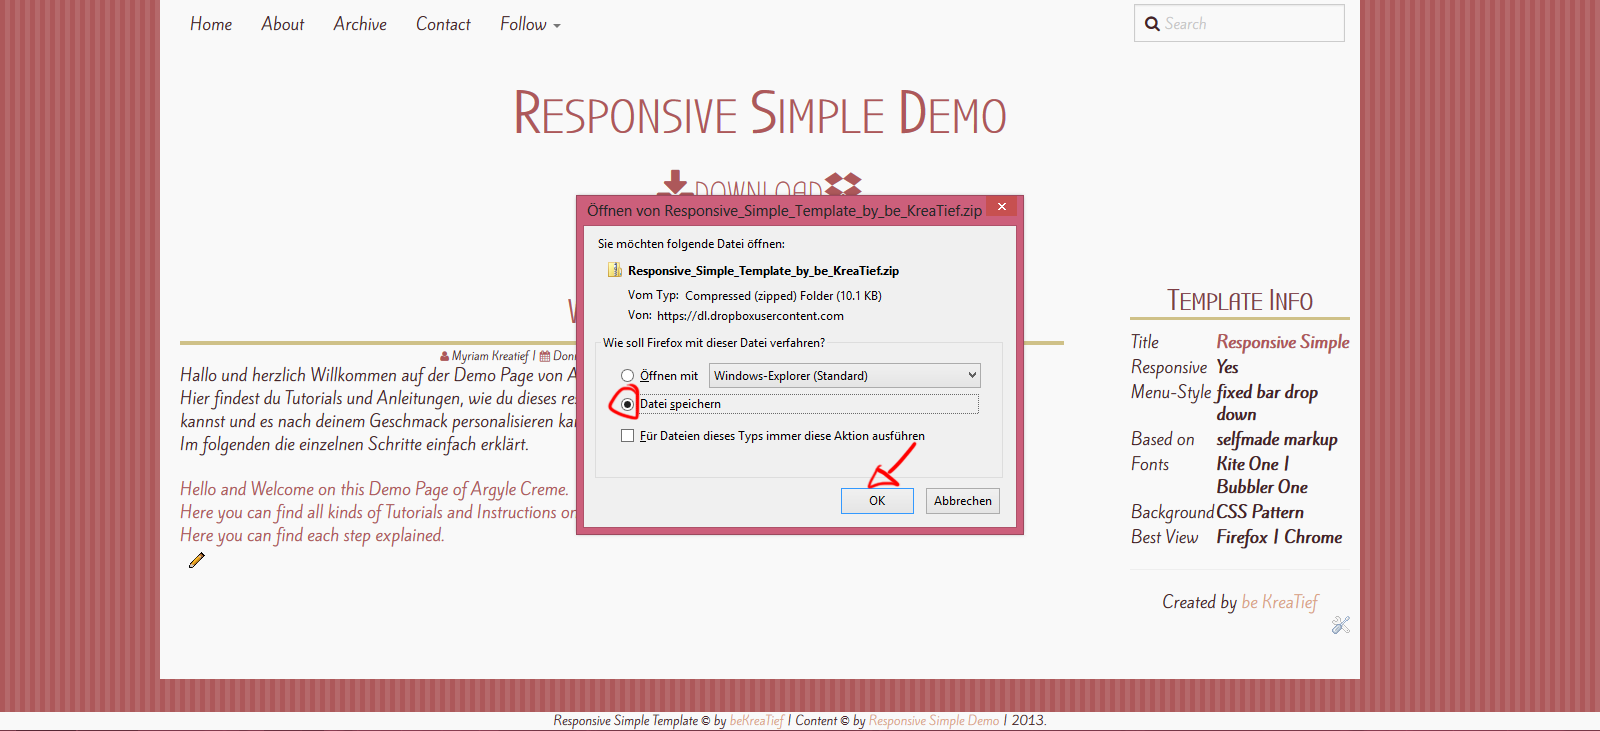
Als nächstes extrahiert ihr das ZIP-Archiv und lest euch das ReadMe durch.
Dann öffnet ihr den Blog auf den ihr das Template hochladen wollt und geht zum Vorlagen-Punkt. Dann auf Backup, klicken.
Sucht nach dem .xml mit dem Argyle Creme Titel und ladet die Datei dann hoch.
Next extract the archive and read the ReadMe.
Open the blog you want to use the template on. And go to the Template View. Than click on Backup.
Search for the .xml of the template and upload.

Das Template ist nun auf dem Blog.
The Template's now on the blog.
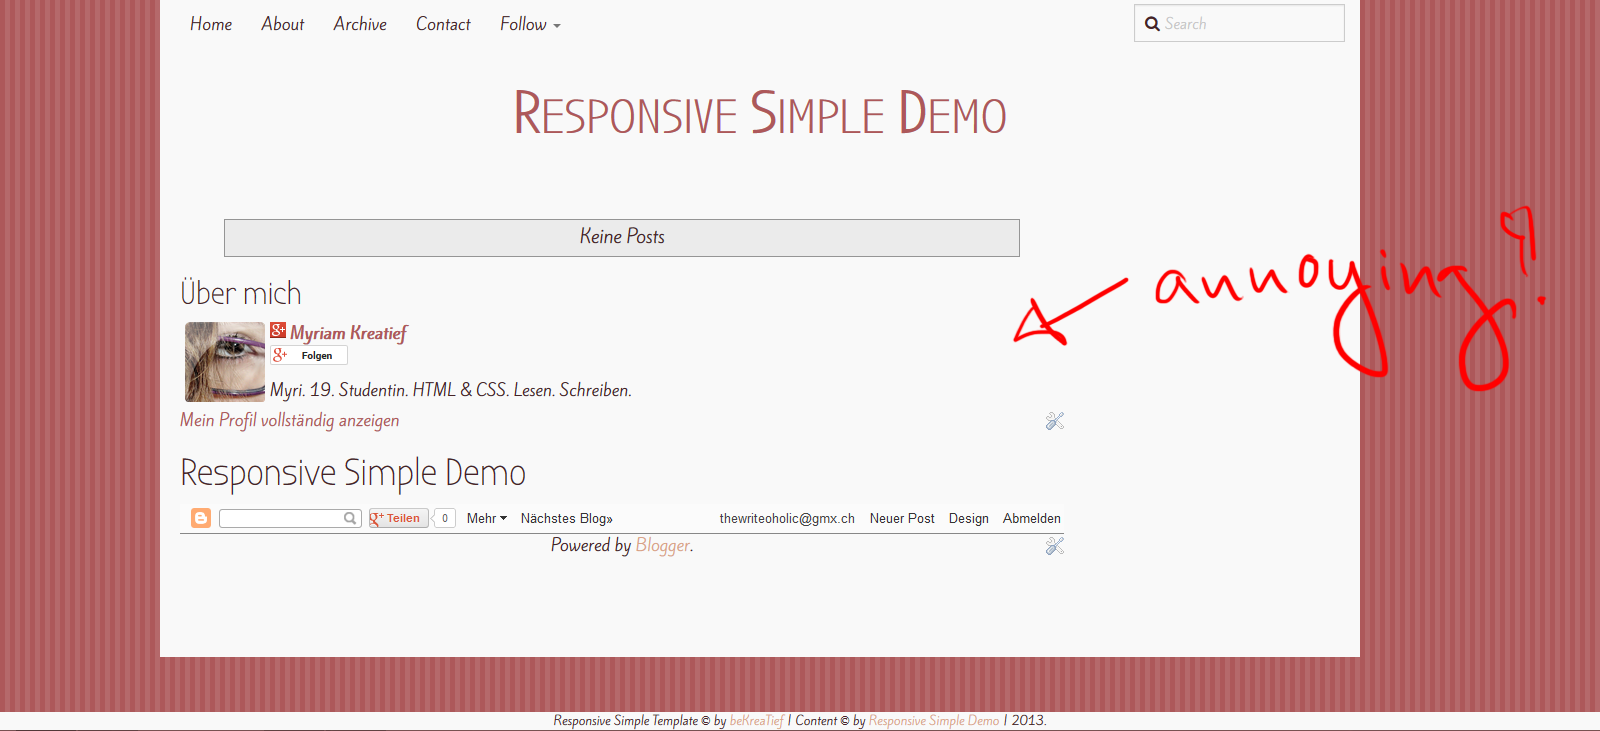
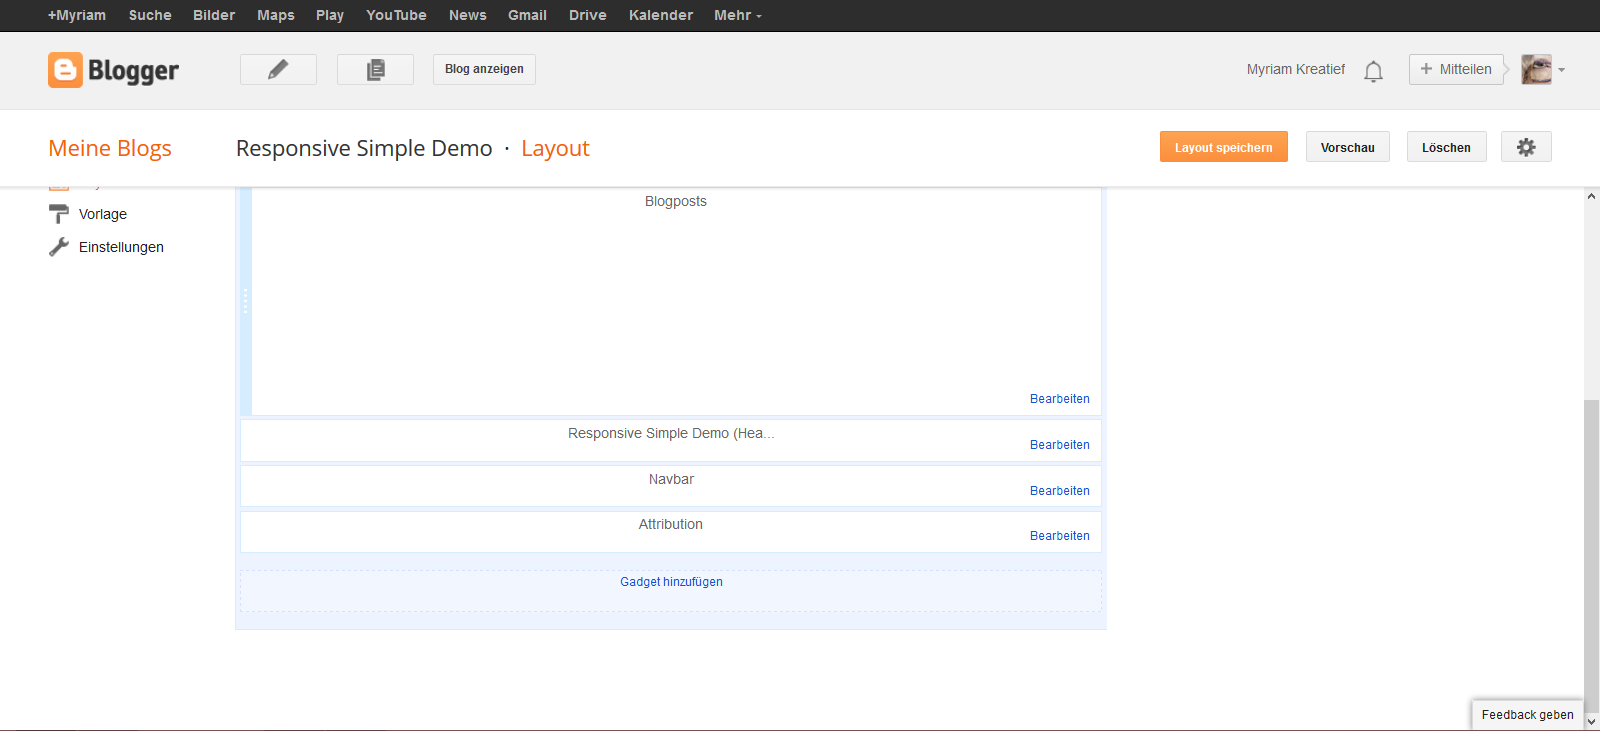
Falls ihr vor diesem Template ein anderes verwendet habt, werdet ihr drei Probleme am Ende des Containers haben. Der Header, die Navbar und die Blogger Attribution werden angezeigt. Da dies hässlich ist und stört, möchte ich euch jetzt noch zeigen, wie ihr das entfernen könnt.
Ausserdem waren bei mir noch zwei andere Gadgets drin, die lassen sich allerdings ganz leicht unter der Layout-Ansicht entfernen.
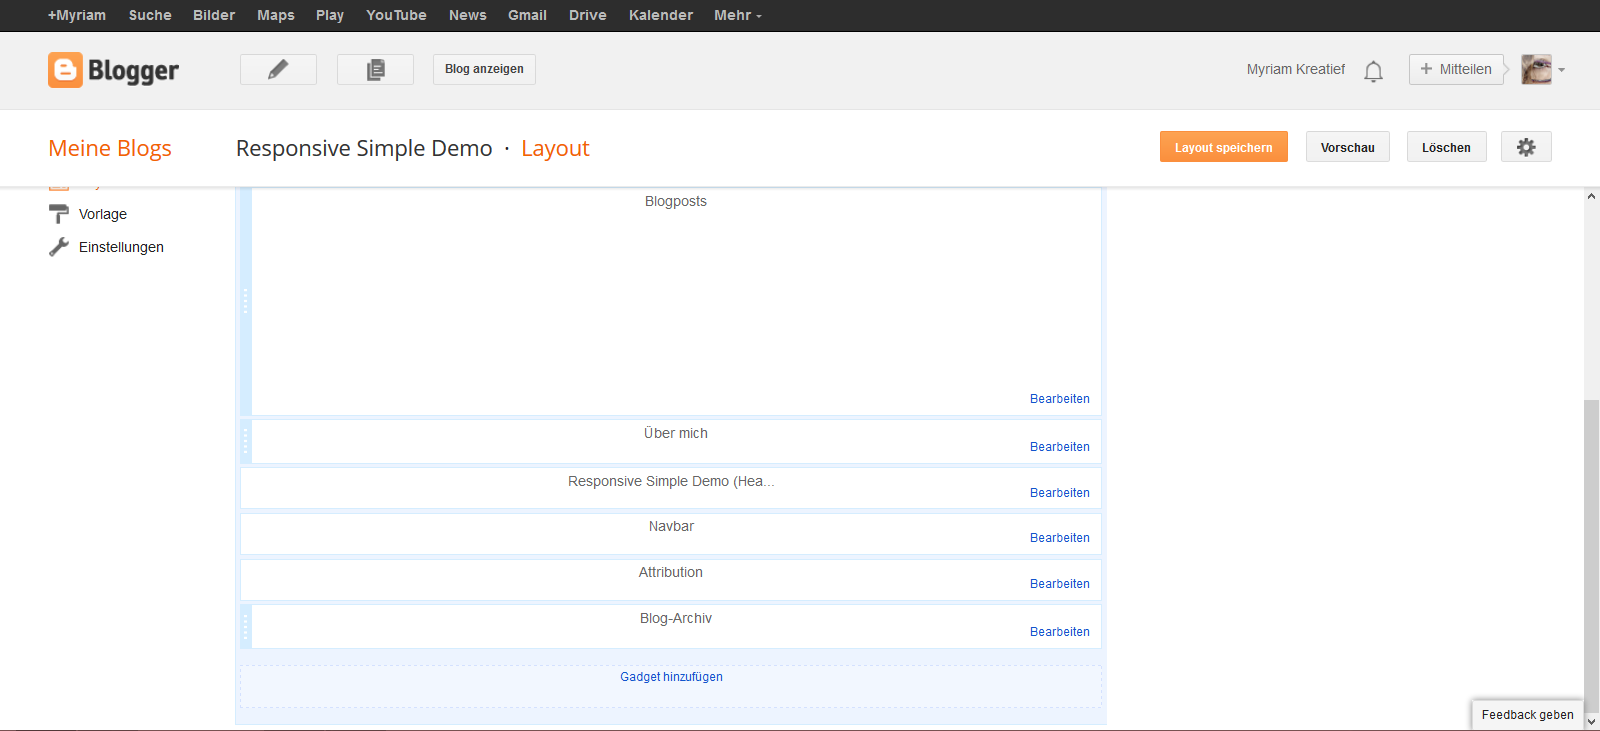
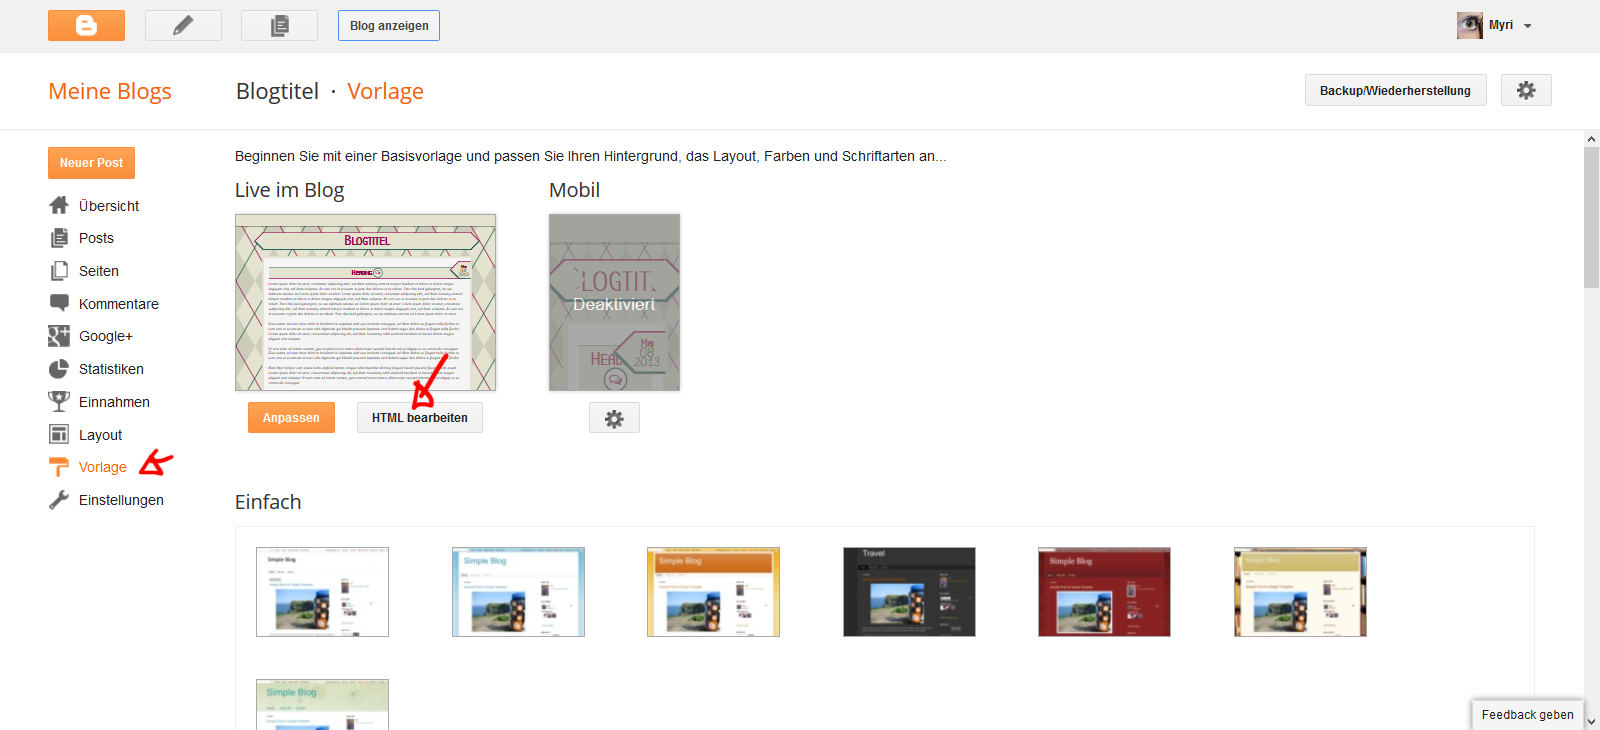
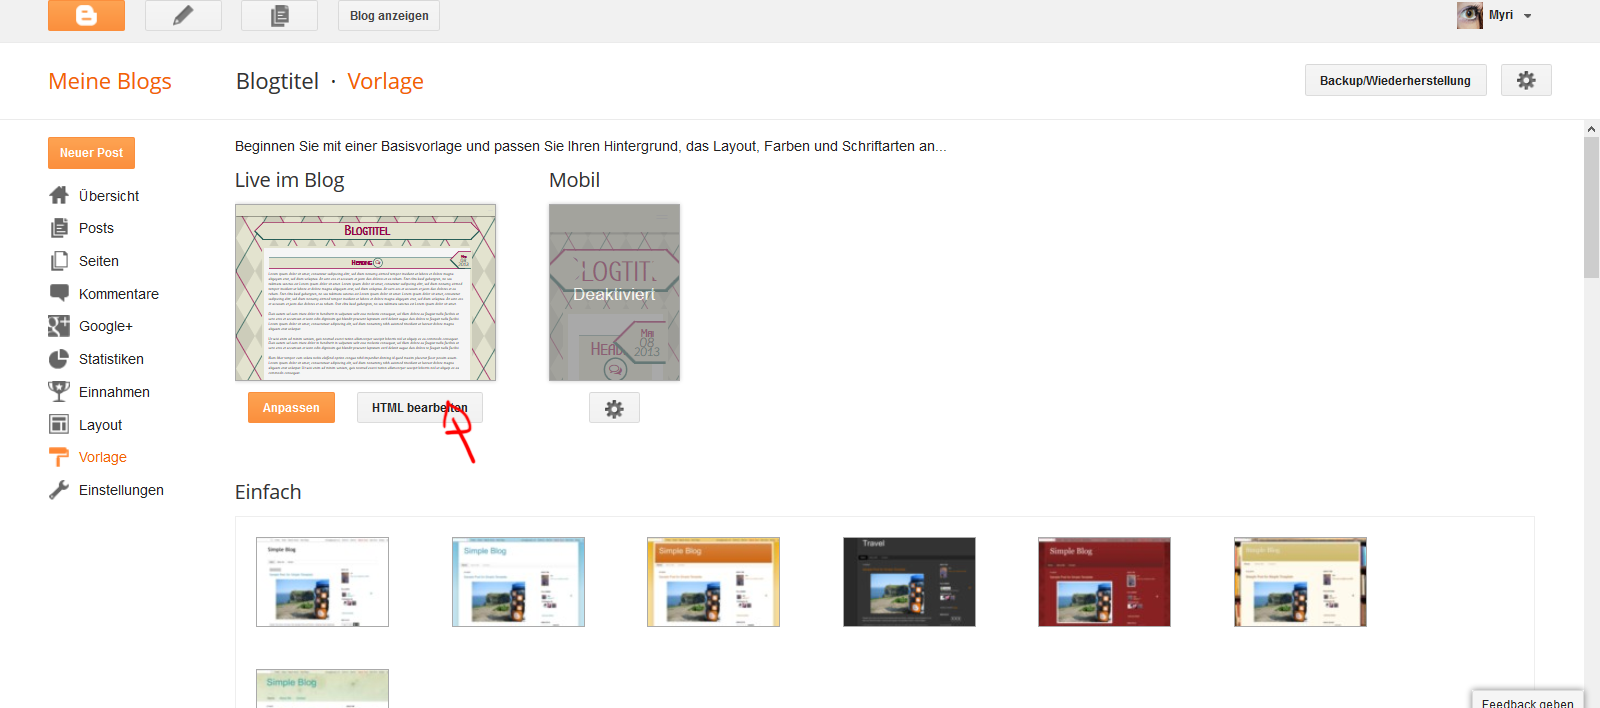
Geht zurück zum Vorlagenteil und klickt dort auf HTML bearbeiten. Oben werdet ihr sehen, dass ihr zu bestimmten Gadgets springen könnt. Klickt auf Header.
Go to the template and edit the HTML. You'll see that you can jump to each widget. Click on Header.
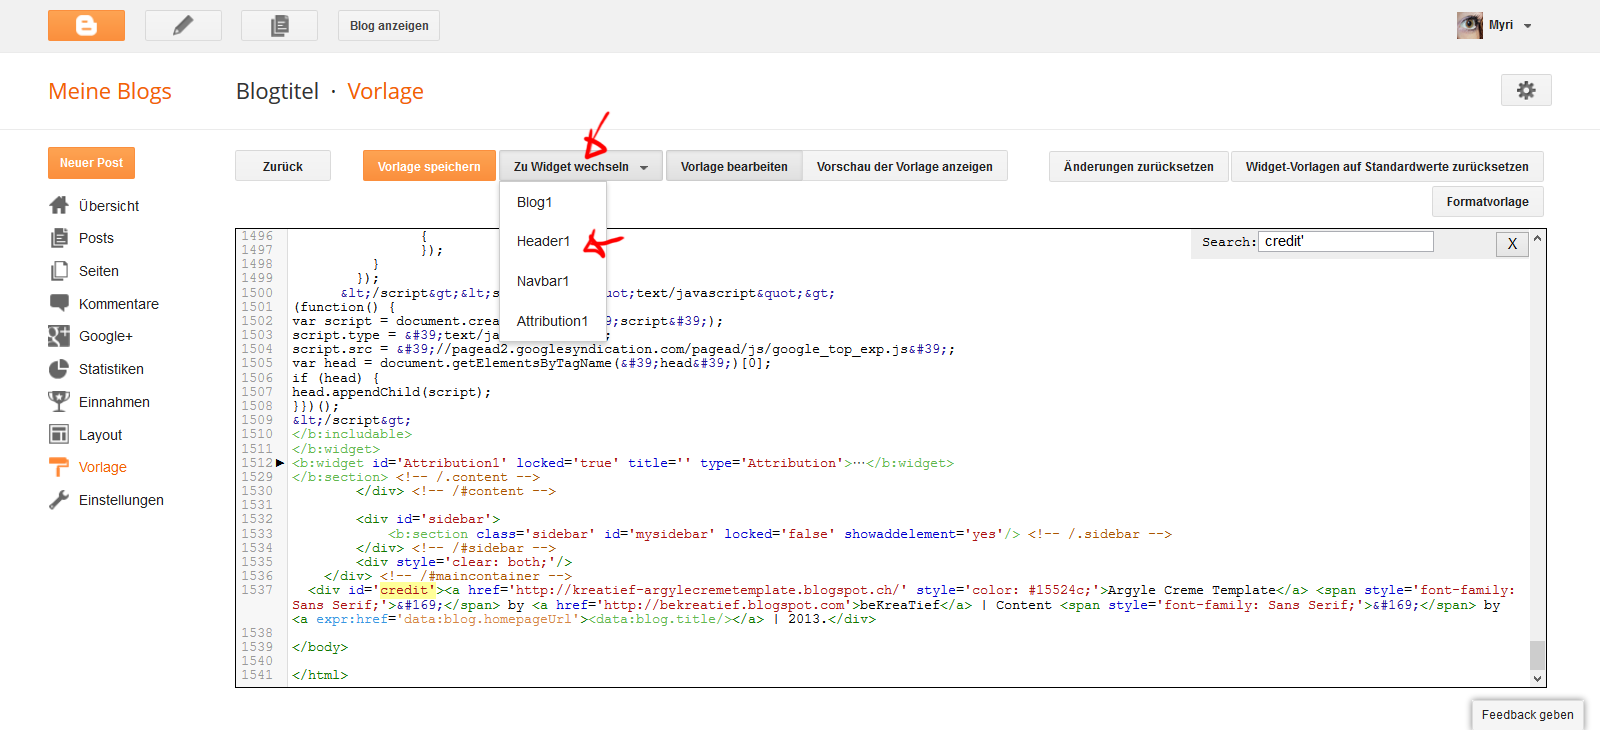
An dieser Stelle werdet ihr folgenden Code finden. Den löscht ihr komplett.
At this place you'll find this code. Delete it completely.
Dann speichert ihr und das Gadget ist verschwunden.
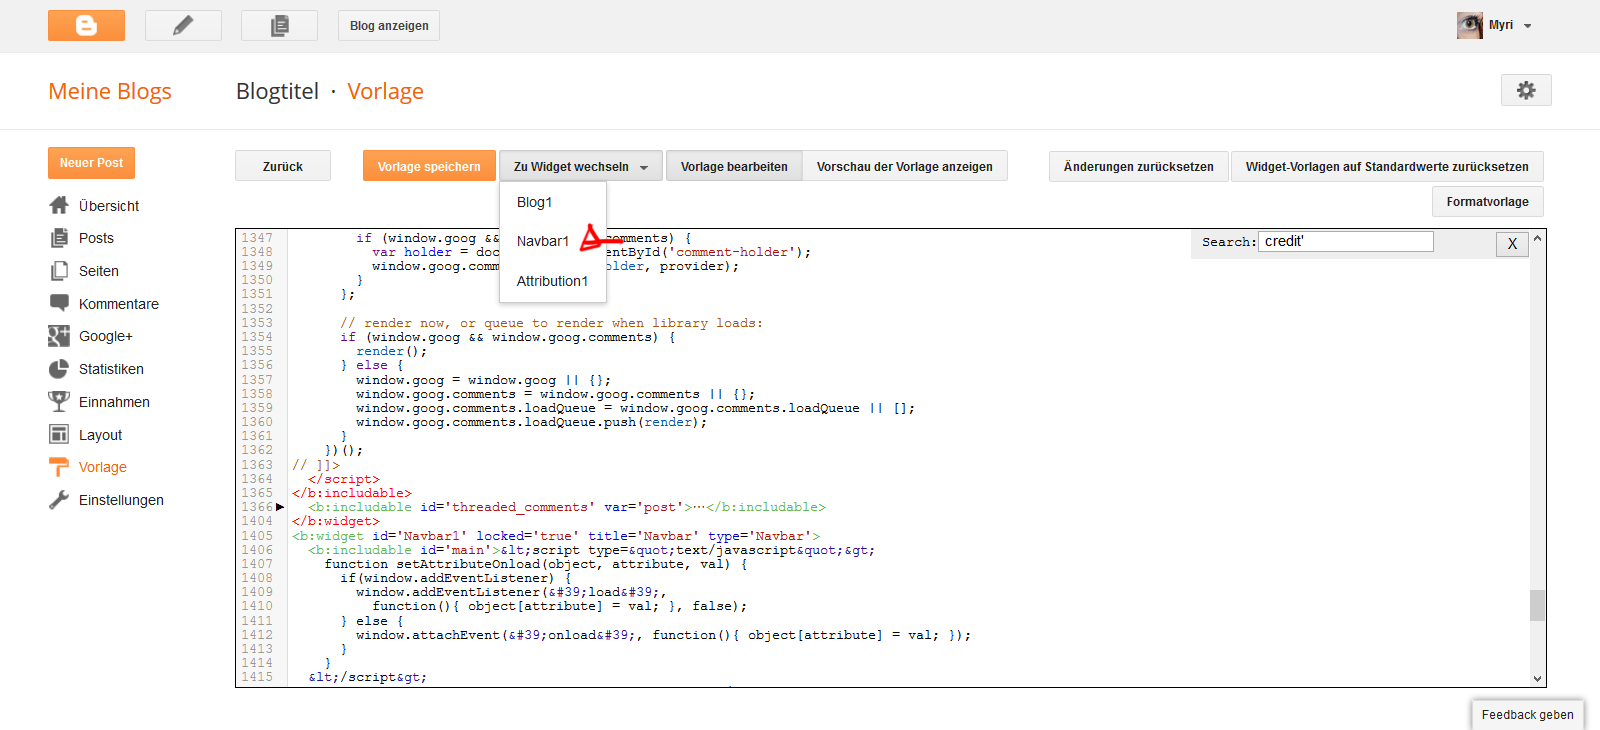
Die gleichen Schritte wiederholt ihr nun für die Navbar und die Attribution. Die Codes habe ich euch hier rausgeschrieben.
Then save and the Gadget's gone.
Repeat those steps for the navbar and the attribution. I did copy the codes to delete in here
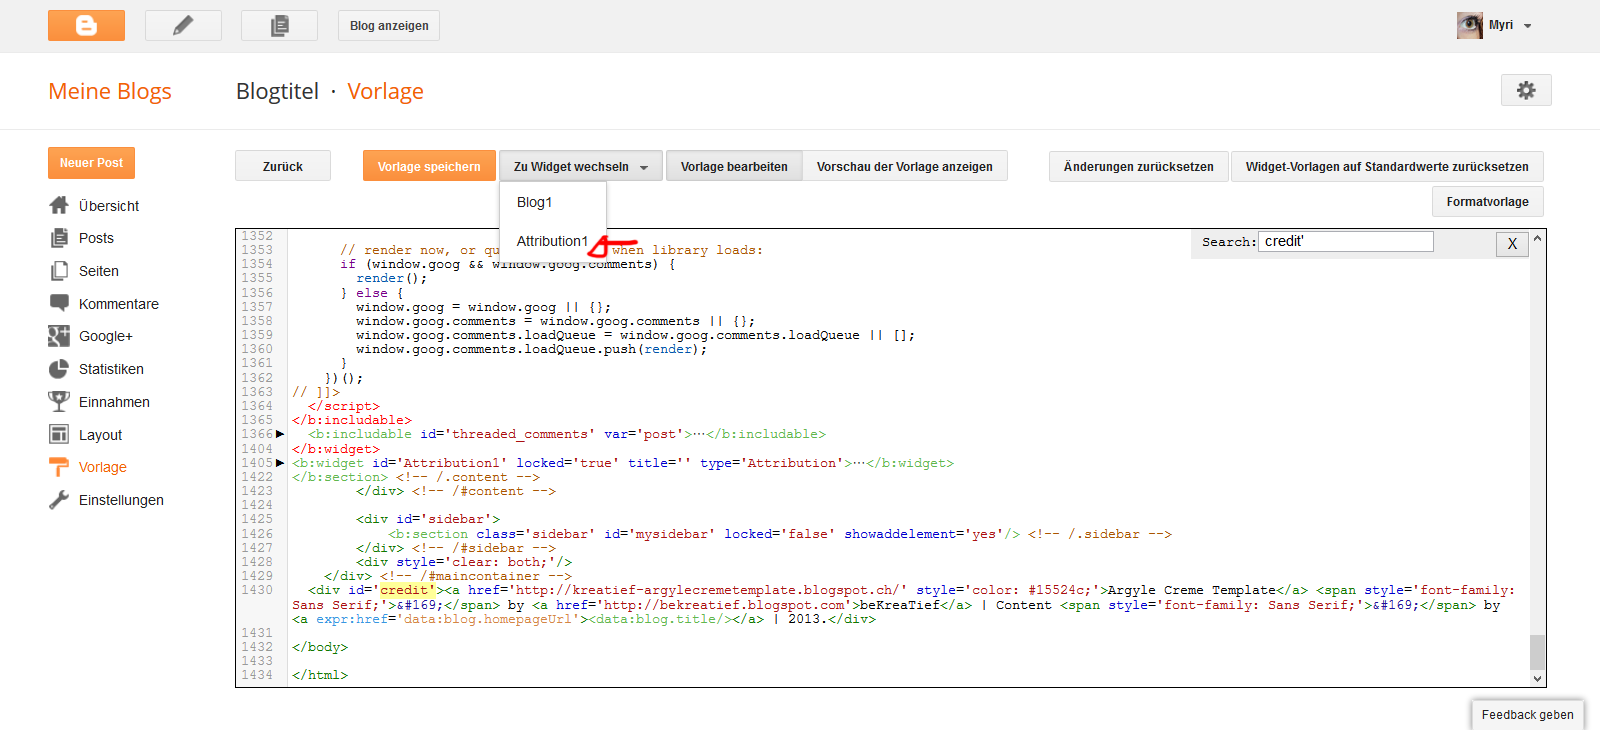
ATTRIBUTION
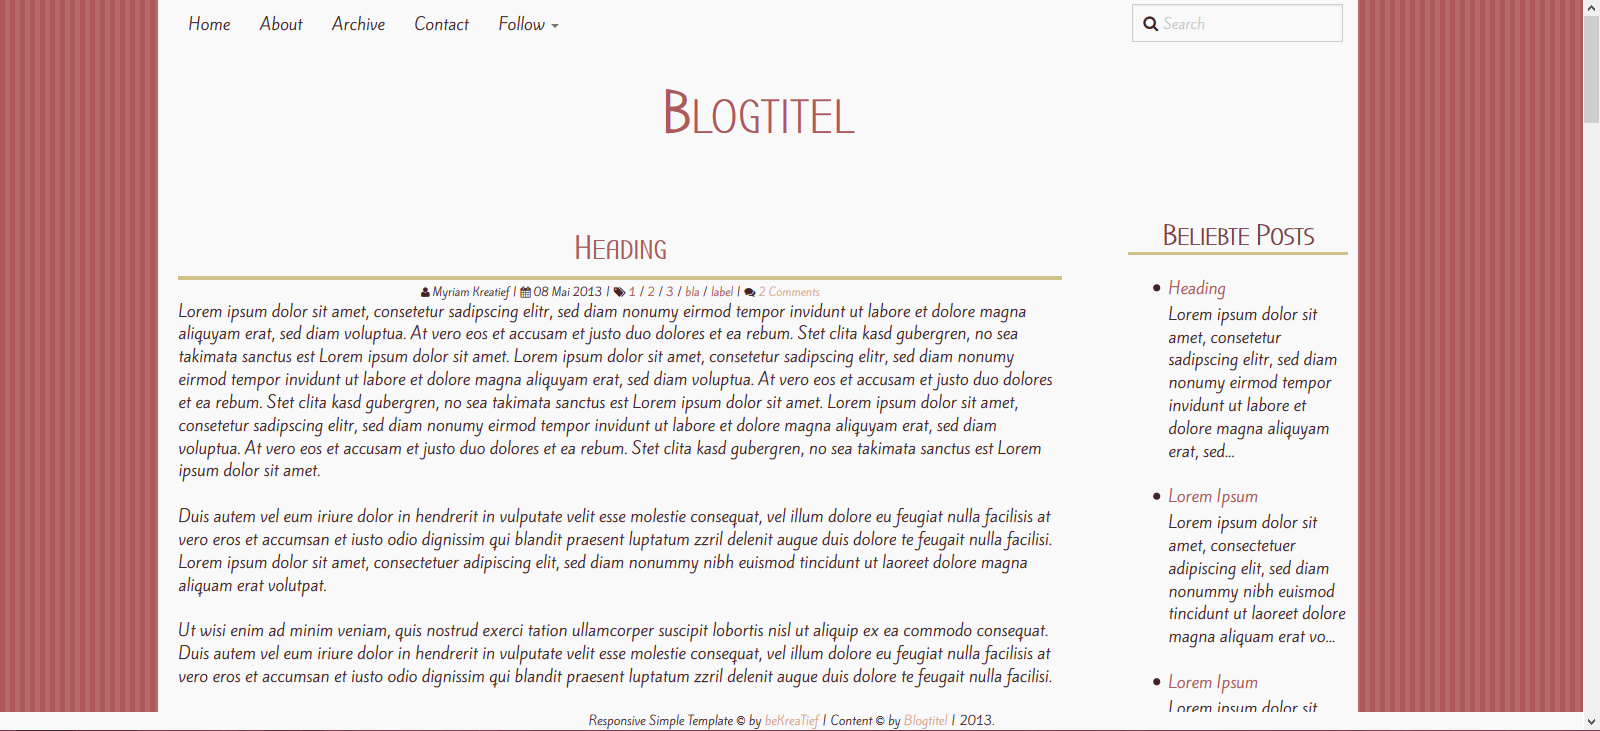
Nach der Attribution bleibt nur noch das Blog-Gadget übrig. Und wenn ihr euch den Blog dann anseht, schaut alles in Ordnung aus.
After the attribution is gone only the blog widget is left. If you look at it now, everything's fine.
Gadgets werden wie in anderen Templates auch hochgeladen.
Gadgets are added jut like you would in other templates.
Responsive Simple is installed very fast. First click on the download link and save the zip-archive to your computer.
Als nächstes extrahiert ihr das ZIP-Archiv und lest euch das ReadMe durch.
Dann öffnet ihr den Blog auf den ihr das Template hochladen wollt und geht zum Vorlagen-Punkt. Dann auf Backup, klicken.
Sucht nach dem .xml mit dem Argyle Creme Titel und ladet die Datei dann hoch.
Next extract the archive and read the ReadMe.
Open the blog you want to use the template on. And go to the Template View. Than click on Backup.
Search for the .xml of the template and upload.
Das Template ist nun auf dem Blog.
The Template's now on the blog.
Falls ihr vor diesem Template ein anderes verwendet habt, werdet ihr drei Probleme am Ende des Containers haben. Der Header, die Navbar und die Blogger Attribution werden angezeigt. Da dies hässlich ist und stört, möchte ich euch jetzt noch zeigen, wie ihr das entfernen könnt.
Ausserdem waren bei mir noch zwei andere Gadgets drin, die lassen sich allerdings ganz leicht unter der Layout-Ansicht entfernen.
Geht zurück zum Vorlagenteil und klickt dort auf HTML bearbeiten. Oben werdet ihr sehen, dass ihr zu bestimmten Gadgets springen könnt. Klickt auf Header.
Go to the template and edit the HTML. You'll see that you can jump to each widget. Click on Header.
An dieser Stelle werdet ihr folgenden Code finden. Den löscht ihr komplett.
At this place you'll find this code. Delete it completely.
<b:widget id='Header1' locked='true' title='Blogtitel (Header)' type='Header'>
<b:includable id='main'>
<b:if cond='data:useImage'>
<b:if cond='data:imagePlacement == "BEHIND"'>
<!--
Show image as background to text. You can't really calculate the width
reliably in JS because margins are not taken into account by any of
clientWidth, offsetWidth or scrollWidth, so we don't force a minimum
width if the user is using shrink to fit.
This results in a margin-width's worth of pixels being cropped. If the
user is not using shrink to fit then we expand the header.
-->
<b:if cond='data:mobile'>
<div id='header-inner'>
<div class='titlewrapper' style='background: transparent'>
<h1 class='title' style='background: transparent; border-width: 0px'>
<b:include name='title'/>
</h1>
</div>
<b:include name='description'/>
</div>
<b:else/>
<div expr:style='"background-image: url("" + data:sourceUrl + ""); " + "background-position: " + data:backgroundPositionStyleStr + "; " + data:widthStyleStr + "min-height: " + data:height + "_height: " + data:height + "background-repeat: no-repeat; "' id='header-inner'>
<div class='titlewrapper' style='background: transparent'>
<h1 class='title' style='background: transparent; border-width: 0px'>
<b:include name='title'/>
</h1>
</div>
<b:include name='description'/>
</div>
</b:if>
<b:else/>
<!--Show the image only-->
<div id='header-inner'>
<a expr:href='data:blog.homepageUrl' style='display: block'>
<img expr:alt='data:title' expr:height='data:height' expr:id='data:widget.instanceId + "_headerimg"' expr:src='data:sourceUrl' expr:width='data:width' style='display: block'/>
</a>
<!--Show the description-->
<b:if cond='data:imagePlacement == "BEFORE_DESCRIPTION"'>
<b:include name='description'/>
</b:if>
</div>
</b:if>
<b:else/>
<!--No header image -->
<div id='header-inner'>
<div class='titlewrapper'>
<h1 class='title'>
<b:include name='title'/>
</h1>
</div>
<b:include name='description'/>
</div>
</b:if>
</b:includable>
<b:includable id='description'>
<div class='descriptionwrapper'>
<p class='description'><span><data:description/></span></p>
</div>
</b:includable>
<b:includable id='title'>
<b:if cond='data:blog.url == data:blog.homepageUrl'>
<data:title/>
<b:else/>
<a expr:href='data:blog.homepageUrl'><data:title/></a>
</b:if>
</b:includable>
</b:widget>Dann speichert ihr und das Gadget ist verschwunden.
Die gleichen Schritte wiederholt ihr nun für die Navbar und die Attribution. Die Codes habe ich euch hier rausgeschrieben.
Then save and the Gadget's gone.
Repeat those steps for the navbar and the attribution. I did copy the codes to delete in here
<b:widget id='Navbar1' locked='true' title='Navbar' type='Navbar'>
<b:includable id='main'><script type="text/javascript">
function setAttributeOnload(object, attribute, val) {
if(window.addEventListener) {
window.addEventListener('load',
function(){ object[attribute] = val; }, false);
} else {
window.attachEvent('onload', function(){ object[attribute] = val; });
}
}
</script>
<div id="navbar-iframe-container"></div>
<script type="text/javascript" src="https://apis.google.com/js/plusone.js"></script>
<script type="text/javascript">
gapi.load("iframes-styles-bubble", function() {
if (window.iframes && iframes.open) {
iframes.open(
'//www.blogger.com/navbar.g?targetBlogID�75342230037271942125546blogName75Blogtitel46publishMode75PUBLISH_MODE_BLOGSPOT46navbarType75LIGHT46layoutType75LAYOUTS46searchRoot75http://avnaogadsgshsgh.blogspot.com/search46blogLocale75de46v�75246homepageUrl75http://avnaogadsgshsgh.blogspot.com/46vt75-7826226094356430796',
{
container: "navbar-iframe-container",
id: "navbar-iframe"
},
{
});
}
});
</script><script type="text/javascript">
(function() {
var script = document.createElement('script');
script.type = 'text/javascript';
script.src = '//pagead2.googlesyndication.com/pagead/js/google_top_exp.js';
var head = document.getElementsByTagName('head')[0];
if (head) {
head.appendChild(script);
}})();
</script>
</b:includable>
</b:widget>ATTRIBUTION
<b:widget id='Attribution1' locked='true' title='' type='Attribution'>
<b:includable id='main'>
<b:if cond='data:feedbackSurveyLink'>
<div class='mobile-survey-link' style='text-align: center;'>
<data:feedbackSurveyLink/>
</div>
</b:if>
<div class='widget-content' style='text-align: center;'>
<b:if cond='data:attribution != ""'>
<data:attribution/>
</b:if>
</div>
<b:include name='quickedit'/>
</b:includable>
</b:widget>Nach der Attribution bleibt nur noch das Blog-Gadget übrig. Und wenn ihr euch den Blog dann anseht, schaut alles in Ordnung aus.
After the attribution is gone only the blog widget is left. If you look at it now, everything's fine.
Gadgets werden wie in anderen Templates auch hochgeladen.
Gadgets are added jut like you would in other templates.
Set Up Menu
Unknown |
Dienstag, 6. August 2013
|
Write A Comment
Das Menu von Responsive Simple ist responsiv und leider nur von der HTML-Ansicht her anpassbar.
The Menu from Responsive Simple is responsive and unfortunately only adjustable in the HTML Editor.
In der HTML-Ansicht sucht ihr nach Navigation
Dann werdet ihr das Menu finden.
In the HTML search for Navigation
You're gonna find the menu code.

Wie sich das Menü zusammensetzt ist in meinem Tutorial dazu genau erklärt (Link Unten). Um die Seiten, die bereits hier sind mit Links zu versehen, müssen die # durch die URL der jeweiligen Seite ersetzt werden.
How the menu is composed is explained in my tutorial about it (link below). To add links to the pages already indicated, just replace # with the URL of the page.
Responsive Top Bar Menu
To remove the navbar, search in the HTMl for the following code
Oberhalb davon fügt ihr folgende CSS ein.
Above that, you wanna paste this CSS
Speichern und die Navbar ist verschwunden.
Save and your navbar is gone.
The Menu from Responsive Simple is responsive and unfortunately only adjustable in the HTML Editor.
In der HTML-Ansicht sucht ihr nach Navigation
Dann werdet ihr das Menu finden.
In the HTML search for Navigation
You're gonna find the menu code.
Wie sich das Menü zusammensetzt ist in meinem Tutorial dazu genau erklärt (Link Unten). Um die Seiten, die bereits hier sind mit Links zu versehen, müssen die # durch die URL der jeweiligen Seite ersetzt werden.
How the menu is composed is explained in my tutorial about it (link below). To add links to the pages already indicated, just replace # with the URL of the page.
Remove The Navbar from Blog
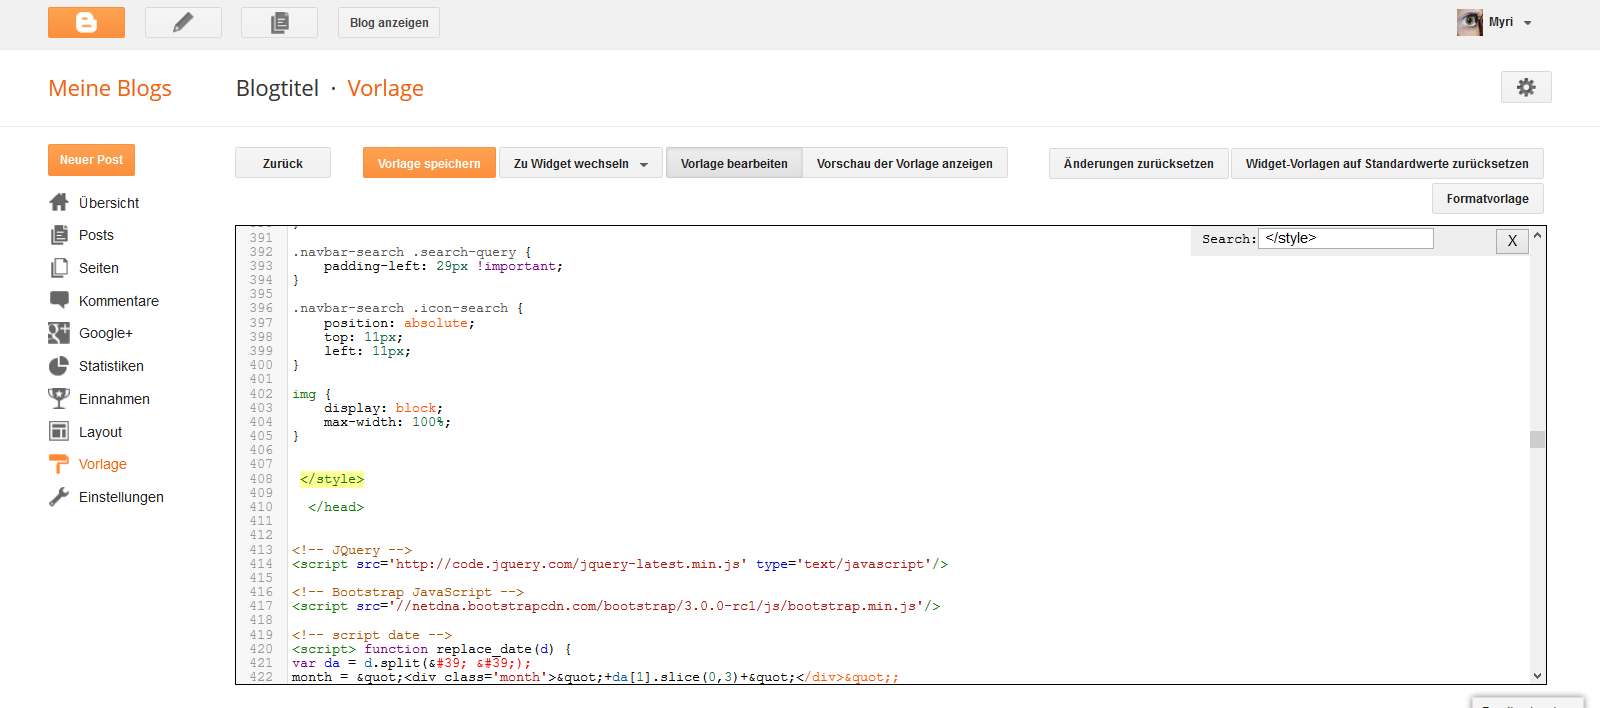
Um die Navbar zu entfernen sucht ihr in der HTML nachTo remove the navbar, search in the HTMl for the following code
</style>Oberhalb davon fügt ihr folgende CSS ein.
Above that, you wanna paste this CSS
   .navbar{
     display: none;
   }
Speichern und die Navbar ist verschwunden.
Save and your navbar is gone.
Adding A Header Image
Unknown |
Montag, 5. August 2013
|
Write A Comment
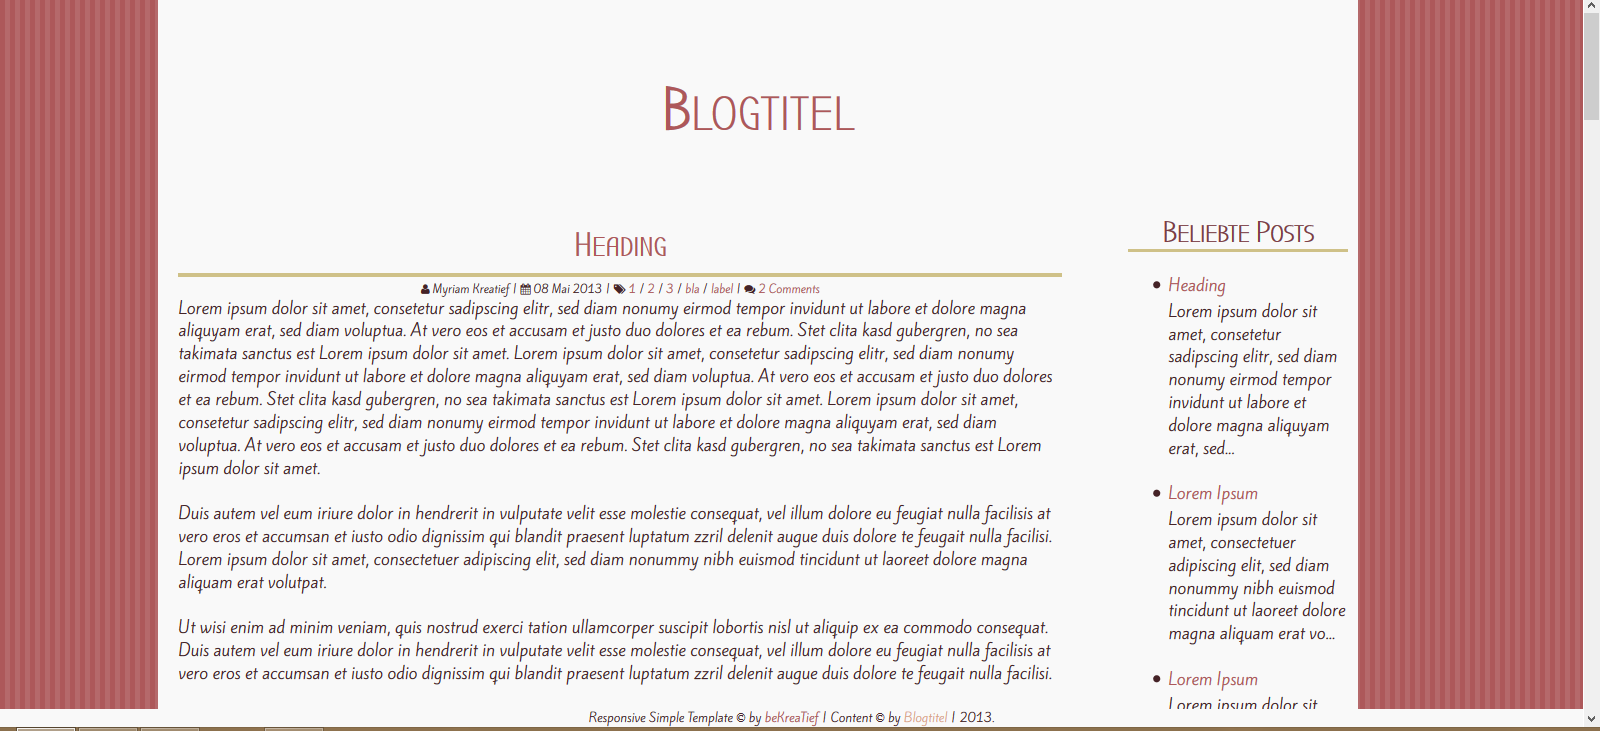
Ihr könnt anstelle des Titels auch einen Header hinzufügen. Dazu müsst ihr euer Bild speichern. Und dann irgendwo hochladen, sodass ihr den Bildlink erhaltet.
You can add your own header image instead of the title. Just save your image. And then upload it somewhere so you have your image link
Um das ganze einzufügen geht ihr ins HTML eures Blogs.
TO add it, open up the HTML of your blog.
Sucht nach
Serach for
Und dann ersetzt ihr innerhalb davon
Inside of it replace
durch, wobei ihr IMAGEURL durch eure Bild-URL ersetzt.
with (while you replave IMAGEURL with your actual image url)
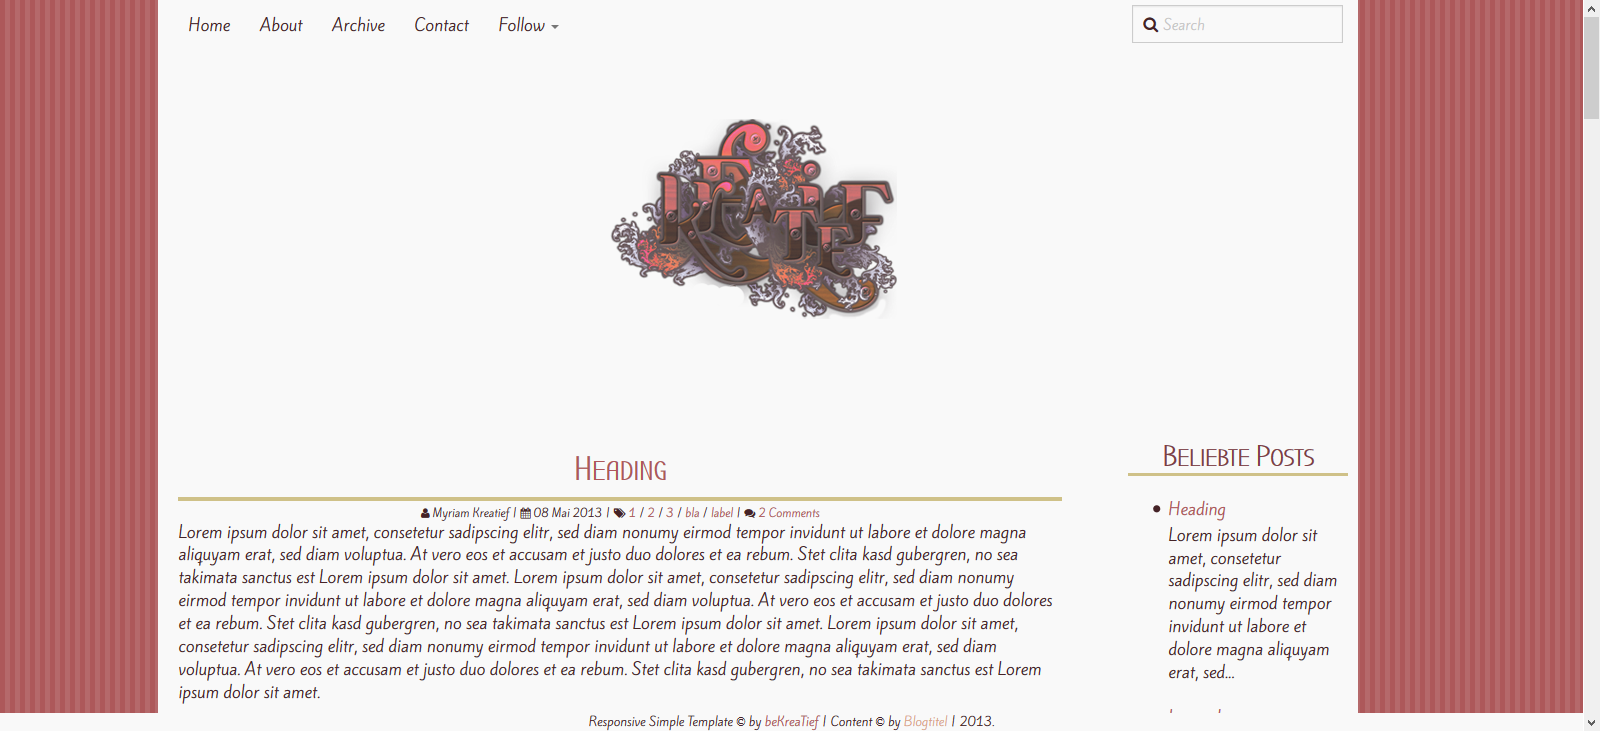
Dann speichert ihr, und euer Header-Bild ist gespeichert. :)
Then save and it's done.
You can add your own header image instead of the title. Just save your image. And then upload it somewhere so you have your image link
Um das ganze einzufügen geht ihr ins HTML eures Blogs.
TO add it, open up the HTML of your blog.
Sucht nach
Serach for
<div id='header'>Und dann ersetzt ihr innerhalb davon
Inside of it replace
<h1><a expr:href='data:blog.homepageUrl'><data:blog.title/></a></h1>durch, wobei ihr IMAGEURL durch eure Bild-URL ersetzt.
with (while you replave IMAGEURL with your actual image url)
<a expr:href='data:blog.homepageUrl'><img src="IMAGEURL" /></a>Dann speichert ihr, und euer Header-Bild ist gespeichert. :)
Then save and it's done.
Set Up The Search Field
Unknown |
Montag, 5. August 2013
|
Write A Comment
Das Suchfeld ist leider nur von der HTML-Ansicht her anpassbar.
The Menu is, unfortunately, only adjustable in the HTML Editor.
In der HTML-Ansicht sucht ihr nach Search Field und findet den Code für das Suchfeld.
In the HTML search for Search Field and you'll find the code for the searchfield.
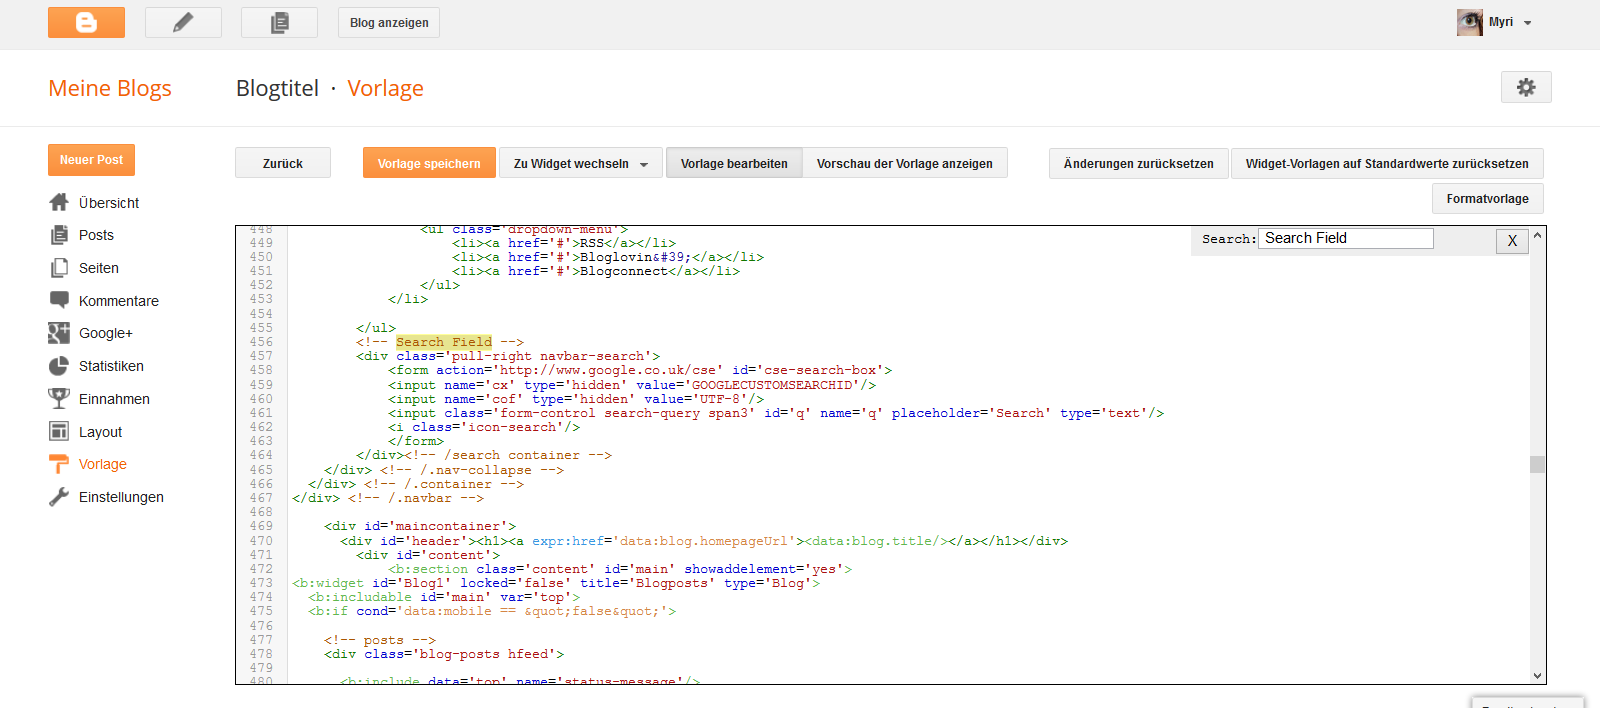
Das einzige was hier getan werden muss, ist GOOGLECUSTOMSEARCHID zu ersetzen. Dazu müsst ihr eine benutzerdefinierte Suchmaschine für euren Blog einrichten. Wie das geht, findet ihr im Tutorial, das ich unten verlinke.
The only thing you have to change here is replace GOOGLECUSTOMSEARCHID. For that you have to set up a google custom search for your blog. How you do that, is explained in the tutorial below.
Google Custom Search
To remove the search field from your navbar, search in the HTMl for the following code
Oberhalb davon fügt ihr folgende CSS ein.
Above that, you wanna paste this CSS
Speichern und das Suchfeld ist verschwunden.
Save and your search field is gone.

The Menu is, unfortunately, only adjustable in the HTML Editor.
In der HTML-Ansicht sucht ihr nach Search Field und findet den Code für das Suchfeld.
In the HTML search for Search Field and you'll find the code for the searchfield.
Das einzige was hier getan werden muss, ist GOOGLECUSTOMSEARCHID zu ersetzen. Dazu müsst ihr eine benutzerdefinierte Suchmaschine für euren Blog einrichten. Wie das geht, findet ihr im Tutorial, das ich unten verlinke.
The only thing you have to change here is replace GOOGLECUSTOMSEARCHID. For that you have to set up a google custom search for your blog. How you do that, is explained in the tutorial below.
Remove The Search Field From Navbar
Um das Suchfeld von der Navbar zu entfernen sucht ihr in der HTML nachTo remove the search field from your navbar, search in the HTMl for the following code
</style>Oberhalb davon fügt ihr folgende CSS ein.
Above that, you wanna paste this CSS
   .navbar-search{
     display: none;
   }
Speichern und das Suchfeld ist verschwunden.
Save and your search field is gone.
Abonnieren
Posts (Atom)